
We have a single Xamarin solution with a main project along with an individual project for each of the platforms being targeted. In this case, we are looking at the individual app designed for New York, called NYWineryHopper. We also see the Android and iOS projects. If desired, we could have included a UWP (Universal Windows) project in order to target windows with our mobile app.
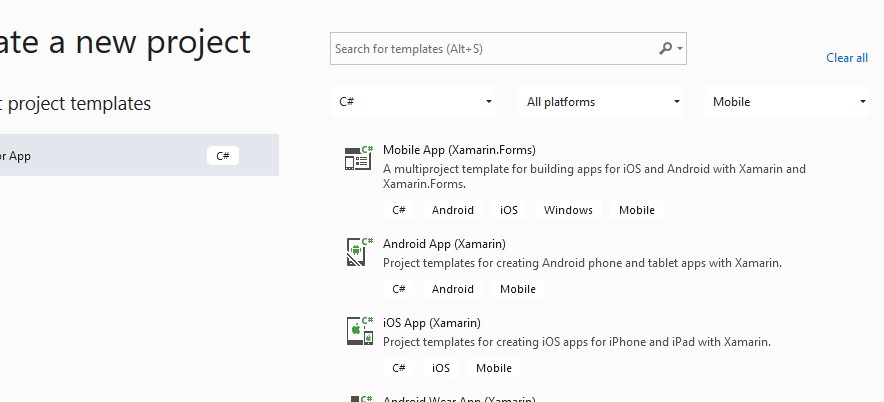
We will start by creating a blank Xamarin Forms project. After opening Visual Studio 2019 (version 16.9.2), click on File-New-Project. Since our development will be using the C# language, that is selected in the first dropdown available and Mobile is chosen on the right-side dropdown. We happen to have the desired selection right at the top. Click Mobile App (Xamarin.Forms) and Next to proceed.
Name your Project, we will be using NYWineryHopper, and select the couple of other options according to your preferences. Now click Create to continue. Next, you can choose a Flyout, Tabbed or blank template. Choose Blank to follow this tutorial but be sure to check both Android and iOS in the lower section of this screen.
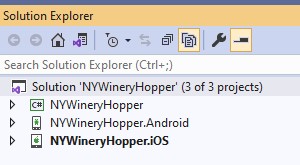
In the screenshot to the left, we see that our work so far has created the three projects needed for a Xamarin cross-platform app running on both Android and iOS. We will begin working in the main C# project, also known as the Portable Class Library (PCL) project. By examining the C# and XAML coding procedures in these projects, we will be able to create our own mobile app based on the knowledge gained in this series of tutorials.
Our next section, Xamarin Cross-Platform Solution Creating the Models Directory, we will create the various models needed to create our functioning mobile app which can be deployed to phones, tablets, iPads of various size screens.